Showing posts with label Crafts. Show all posts

Friday, October 19, 2012

How to use a handy sewing machine


Unlike other branded handy sewing machine, this one is not that complicated to operate.


Accessories:
  1. Needle threader
  2. Small spool pin
  3. Thread 


 Watch the video below to know how to operate this type of handy sewing machine.


Wednesday, October 3, 2012

Silhouetted Candle display


Materials:

Empty glass jar
Diff. kinds of Ribbons
Candles (Scented; optional)
Special paper (optional)

Procedure:
  1. Tie a ribbon in the middle of the jar. 
  2. You can also layer ribbons with different sizes. 
  3. Place the candle inside the jar.
If using a special paper:
  1. Cut the paper with the size fit with the diameter of the jar.
  2. Fold the paper into fourths and draw different patterns. 
  3. Cut and trace the patterns. Unfold. 
  4. Place the paper cut in the middle of the jar. 
  5. Instead of sealing with adhesive, tie a ribbon on the top of the paper and jar.

Friendship labels


    I was redecorating my room lately and I was forced to remove all the old stuff inside my old closet to move the closet on the other side of the room. I have this kind of behavior of checking on the things that I was removing in one place, though I had seen them for so many times. And, that always took me a long time to finish doing this removing thing and putting them back together.

    In the middle of the clutter and mass of clothes, an old box caught my attention.

    It was the box that I was about to give to my high school teacher, but I refuse because of the cuteness of the cover and the effort of making it.

    As I recall, I made it five years ago, I was on my third year in high school during that time. It was just made of thick cardboard connected by adhesive, which is why I never wondered the moment that I lift it up and the lower part of the box was already detached.

    It was full of my high school memories and the best thing that is inside this box are these dangling charms and friendship bracelets.

    The bracelets and charms were made by Jho's mother; Jho is my long time and one of my closest friend. On time, she came with a bag full of it in her hands and gave us these. Aside from her closest friends, she also gave some of it to all the other girls in the class.


friendship bracelets

    These reminds me that it was the year (the only batch), for the very first time that everyone was so close to each and it feels like we were brothers and sisters and everything was just full of fun. Though other people thought we were a class chaos, we stand up and showed our ingenuity to the people.

    But between these beautiful charms and bracelets, my favourite was the red dangling charm with my nick name on (which, actually was my initial). I think of it as my lucky charm. ^_^ I just use it in times that I'm in a risky situation.

My favourite dangling charm

     Gladly, (I think) it really helped me a lot because it makes me think that I'm not alone. That I'm with my friends, cheering me up. I hope they remember me and the other girls and also the friendship we had during those times every time they saw these wonderful charms.


Sunday, September 23, 2012

From old piano/keyboard stand to a artistic drafting table


    From the clutter at the stock room, I found an old Piano/keyboard stand that had been there for almost five years. Good thing is that it hadn't been covered with rusts although it has been stocked there for many years. It has a good quality of coating that preserved the metal for over the years.

   Since it is my responsibility to make use of the things that I refuse to give away. I decided to turn it into a drafting table.


   Using some scrap woods and my small knowledge in carpentry, I made a board and tucked with a wood screw underneath where the keyboard was placed and put a long piece of wood in front as a support. 


   For the board, I used a felt paper as a wood cover instead of applying a varnish. I did some Paper cut design covered with a colorless varnish below the drafting area to make it more stylish and not just as a plain drafting table.

Too much of the designs for inspiration

Flor de lis... Close enough


Trying to capture the gloss


Monday, September 17, 2012

Christmas decor from old jogging pants


    I was busy lately, enjoying the pleasure of surfing, literally, over the clutter on our stock room (everything-from childhood until present-is still there, with spider webs and dusts)
 
    I found my old school pants for physical activities. Ah, the atmosphere was so nostalgic. It has been there for almost 4 years. My mother wants to get rid of all the stuff there by donating all of it to make the room functional. But I refuse not, what a very sentimental lady, it is hard for me to let go of things that are part of me especially, my childhood.


From an old pants, I made myself a very own Christmas decor. I also made a tutorial that is posted at my Youtube account. I'm not a professional at making tutorial, so I give my best on making the video easy to understand.

Christmas Decor Video tutorial


Procedure: 

For the petals:
  •  Cut a pattern of leaves and petals into a hard paper.
  • Trace the pattern into the red cloth for the petals and green cloth for the leaves. 
  • Make 6 pieces or 3 pairs of bigger petals, same number of pieces with the smaller ones, then cut and sew.
  • Cut a smaller version the pattern for the smaller petals.
  • After sewing, fold the petals inside out.Fold the petals into fourths.
  • Connect each by sewing at the bottom end of the petals.
  • To give an illusion of wider petals, sew in between the sides.
For the yellow balls: 

  • Cut 3 pieces 2x2 inch square of yellow cloth.
  • Use small pieces of cloth as a filling to make small balls.
  • Repeat step #5 (petals) to connect the balls.
Layering:
  • Layer the petals; put the smaller ones on the top.
  • Then add the yellow balls on the top of the petals and sew.
  • Arrange the leaves; do the same pattern as to the petals.

Tuesday, August 14, 2012

Creativity strikes: Wood carving and sketching


   I had burned the whole week indoors because of the devastating southwest monsoon. Aside from getting myself busy fixing my garden during my free time under the heavy pouring rain, I summoned my creativity during the nighttime and expanded my artistic skills in sketching.

   It's been months since the last time I touched and peek through my sketch pad.

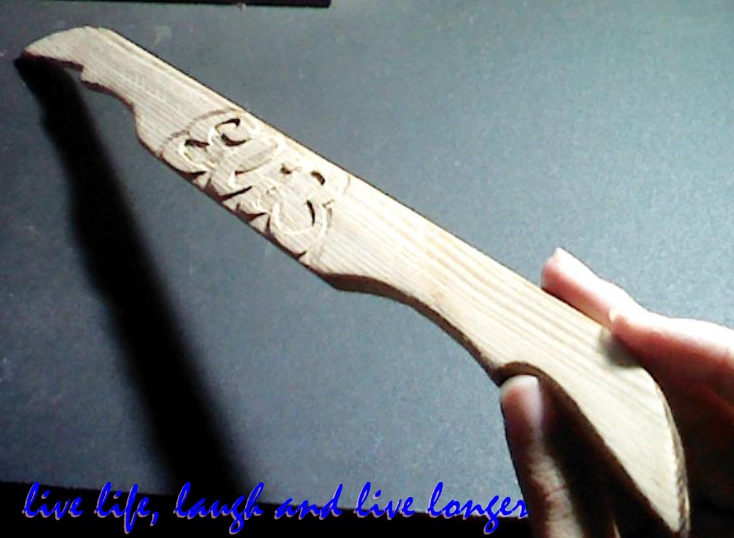
   Since it was raining and the darkness has already covered my chilling mind I decided to make use of the scrap wood that I found under my bed last week.

My bat tag

     Just as I had expected, it doesn't turn out the way I wanted. Does it look like a bat?

They keep teasing me about this, BATMAN! nanananana!

   Hope so... I want it to be like a bat tag, my nick name carved on it and finish it with some mahogany varnish. I'm planning to do another one and paste it on the head of my drafting table, Yey!


   And yesterday, I finished sketching The Mad Hatter Johnny Depp.

The Mad Hatter Johnny Depp


Saturday, June 16, 2012

From Old Fashion Shirt To A Cute And Fashionable Hobo Bag

(I'm not good at tutorial so I decided not to do one, but it appears to be a tutorial in the end.)

     I was in the middle of fixing the clutter in my mom's old closet when I saw my mom's old shirt .

      It has a good fabric (It's a stretchable patterned fabric... and I don't know what exactly they call it) and is still in good condition. I decided to make it a hobo bag since I was planning to go back to Uni this coming semester (Which happens that I'm not financially not able to... There's still a next semester -___-.)


  • To avoid errors in cutting the shirt, I traced the pattern on the canvas. The canvas will serve as the cloth inside the bag.


(My marker's not yellow and green, avoid messing with fabric ^-^. I just do SAI paint program to put a mark on the pic.)
  •  The length of the handle of the bag depends on how long the shirt is and on how long you want it to be.


  • This is how the shirt looks like after tracing.


  • Leave at least one inch for seaming. 


  •  Sew the bottom of the shirt same as the canvas. Put the canvas inside the shirt before sewing it to make sure that the canvas won't look too bulky inside the shirt.


  •  After having a sudden change of mind, I decided to put belt loops instead of pockets.


  • This is how the bag should look like.


  • I use the lace as the belt of our bag. It pretty works well with the fabric.


This is how the bag will be after tying the lace in it.


Tuesday, April 3, 2012

Handy Sewing Machine

I found this handy sewing machine while I was walking on my way to buy to the jeepney stop at bayan, Novaliches, Quezon city. I bought this at a very cheap price. Found it very handy and easy to use.

It's like a stapler. About five (5) inches long.


hope it could make my projects easier.

To know how to use this type of handy sewing machine CLICK HERE .

Tuesday, March 27, 2012

My first hand-stitch corset

   This is my first corset. Why do I have to make one? I don't know, lately I was fascinated by the goth genre and I saw one of the dress wear by a gorgeous lady and found it look cool so I made one. And corset is (what I think it is) the second skin of Goths just like jeans to other people and just like what the fashion world said. And also to maintain a good posture and to avoid scoliosis.
   

   I spent ten (10) days on making this corset. I've done it hand stitched since I'm afraid of   using a sewing machine.